Followers

Thursday, June 25, 2020

Bible Class Songs!!

Hello and Welcome! 

Preschool Bible Class Songs!

Primary Bible Class Songs!

Bible Class Songs for Older Children!


Thanks for stopping by and feel free to leave a comment!


Saturday, June 20, 2020

Golf Tees and Books of the Bible!

Hello and Welcome!

The books of the Bible are AMAZINGLY INSPIRED books of Gods Word! It is our all important sword in the armor God wants us to wear; Ephesians 6:10-18. Learning how to wield our sword takes practice, practice, practice! But aren't we so very thankful that we CAN practice and help others practice as well! One Sunday morning as I was getting a few Bible games out for my early bird 3rd and 4th graders, a sweet, accomplished sister in Christ, (Renee Hunter) came into my room and wanted me to try a new Books of the Bible game she had made to see how this grade level reacted to them. Of course I would try it! 
I love games that help us teach the Word! 
Here are Renee's new Books of the Bible game!! 
You use it with golf tees!
Nice weight card stock, laminated cards!

Each card names of one book of the Bible, your choice of New or Old Testament and division!


Two golf tees per card. Put your golf tee into holes that show which testament and division we find the book.


Once you have your answers chosen by placing your tees, check yourself by turning the card around and if the golf tees are in the highlighted area you are correct!

Well they loved it! 
This age always love a challenge!!
We had so very much fun learning how to use
these Books of the Bible cards!

Thank you Renee Hunter! The books of the Bible are fun to sing and to say and by time they are this age they really need to be learning them if they have not already. The Bible Divisions are another challenge which this game helps your students learn! Songs!


Books of the New Testament Books of the Old Testament Books of the Old Testament 39, 27, 66 Bible Chant A "Gold Star" Just for You! Click the gold star to order a set of these Books of the Bible Cards with Divisions for yourself!


Thanks for stopping by and feel free to leave a comment!


Thursday, June 18, 2020

Bible Person Mobile!

Hello and Welcome!

Room Décor!

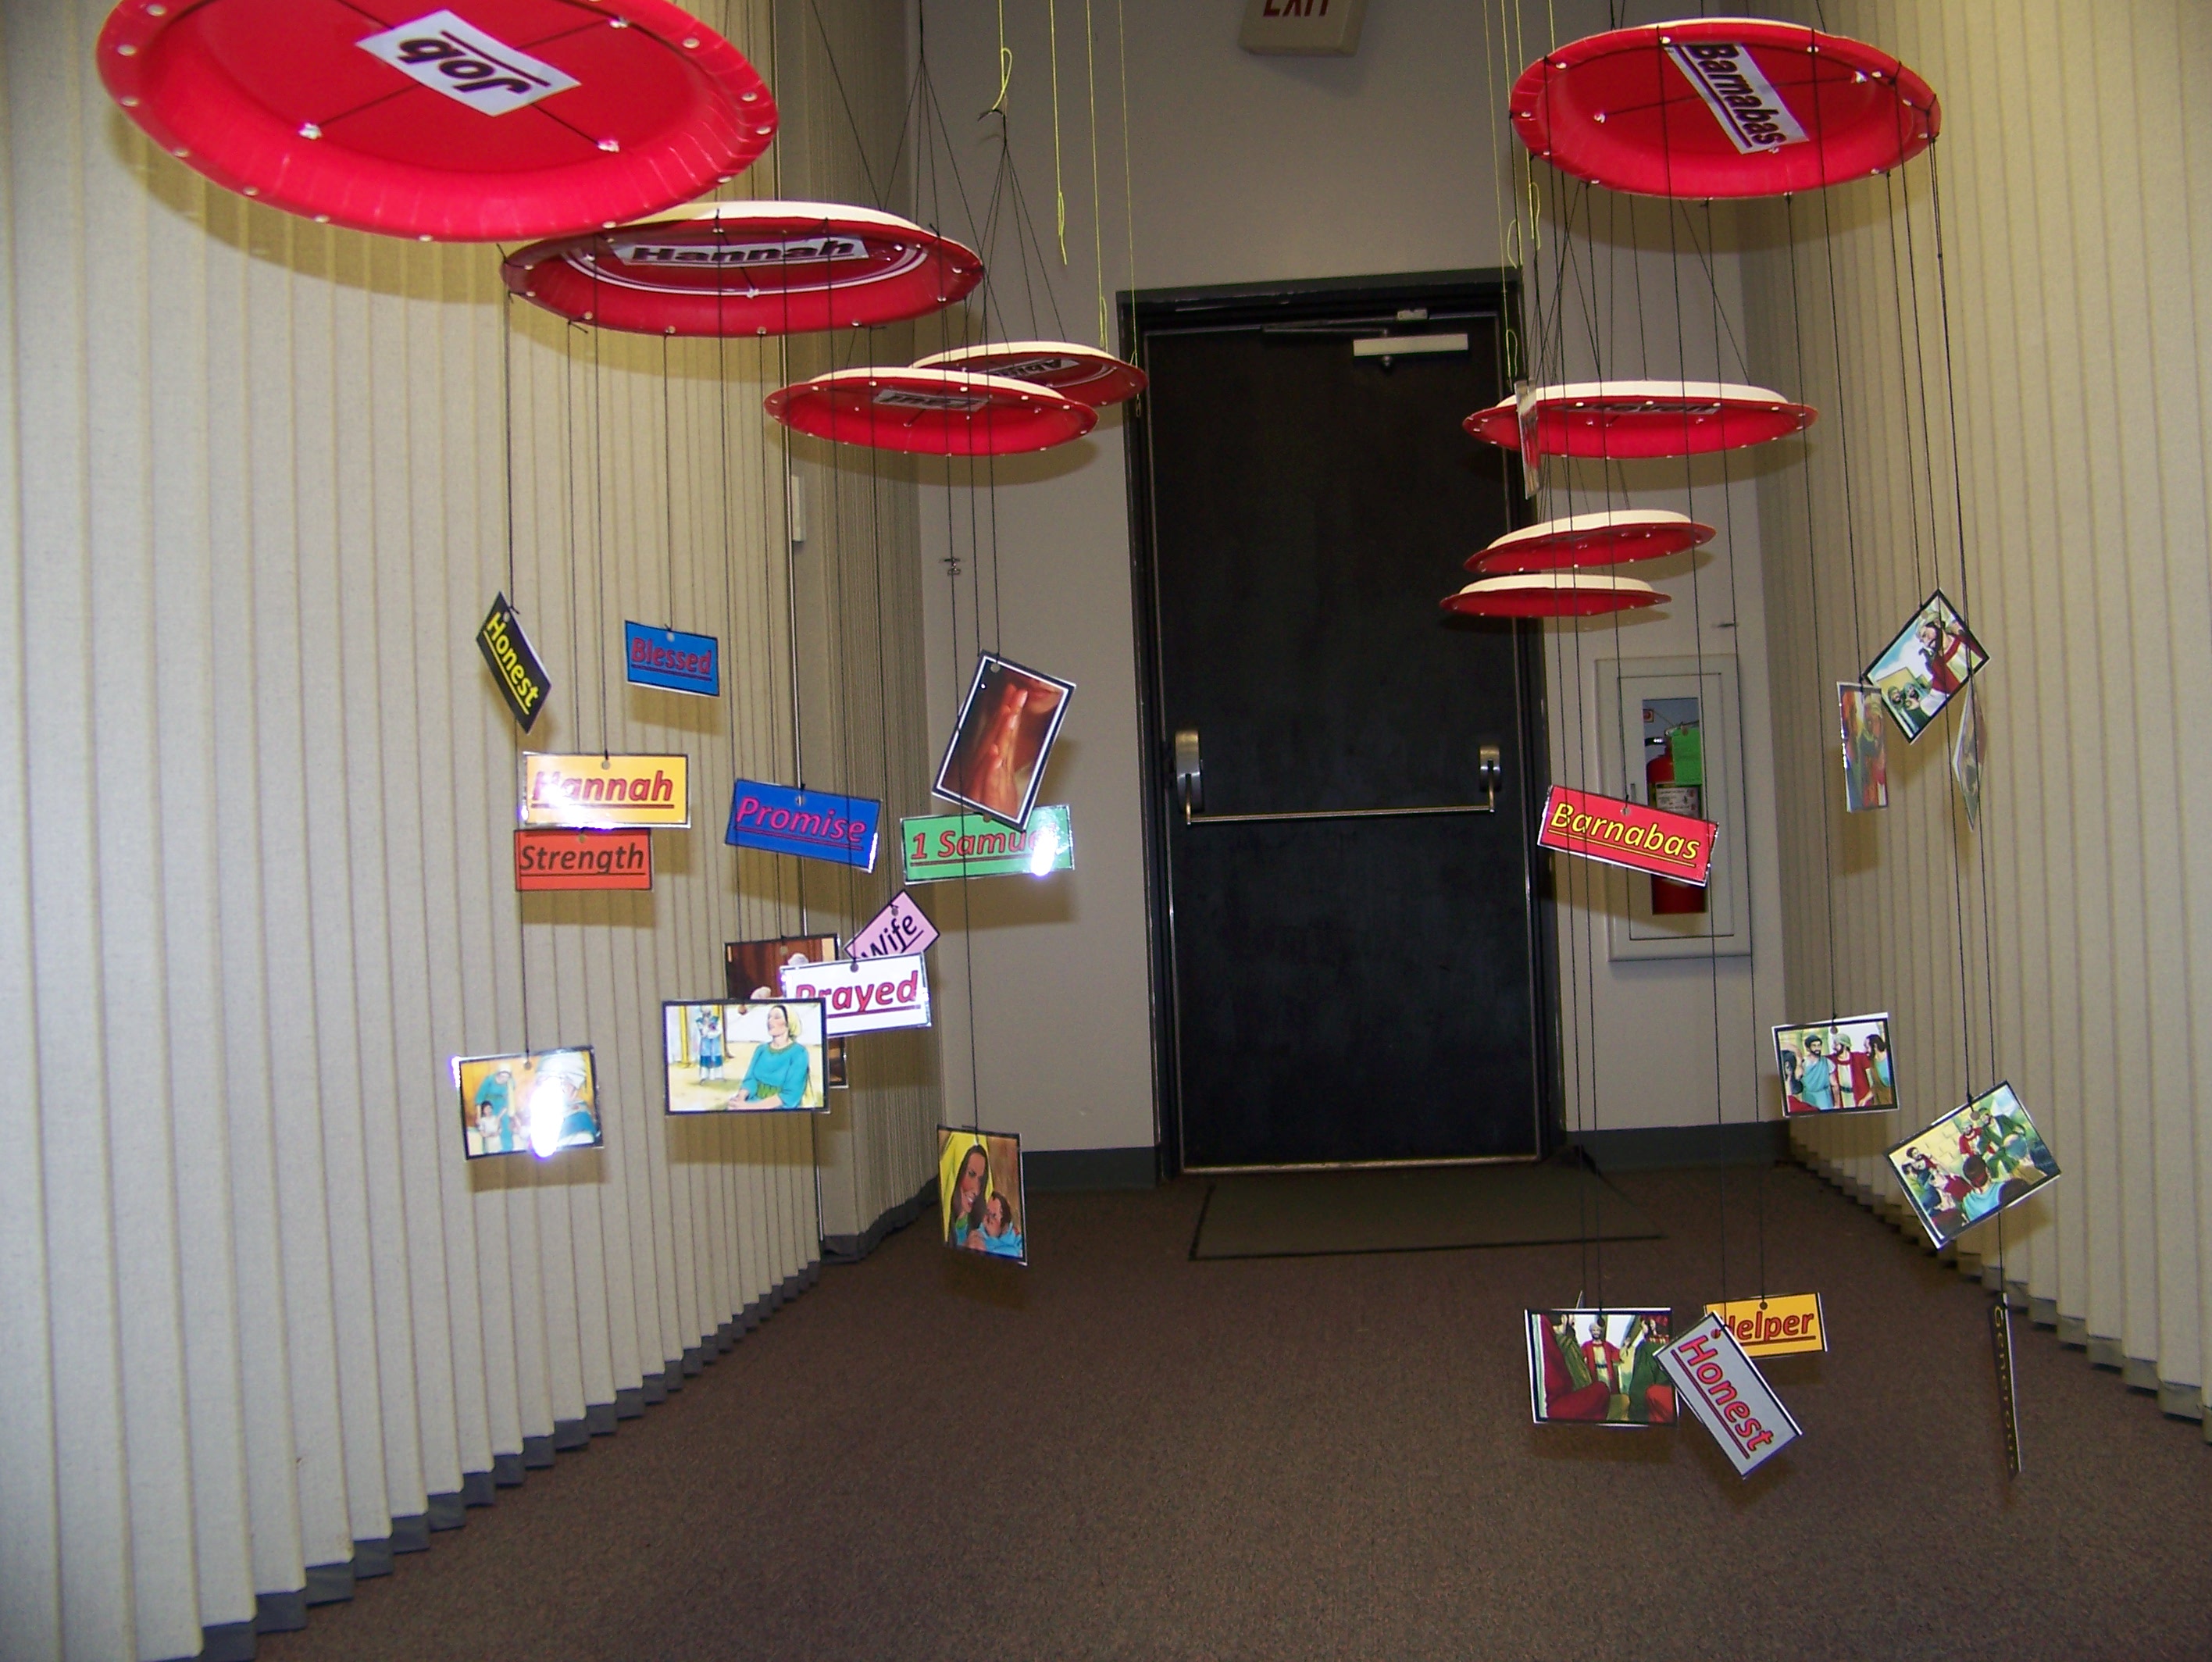
I enjoy having visual aids 
in my classroom that remind 
the students of where our studies 
are taking us, who we are studying 
about, and events that took place.

This Bible person mobile 
meets the above criteria so I was 
anxious to share it with you! 

This visual aid was done one year with our 
Future Teacher Training Camp. 
The young ladies all enjoyed 
making their mobiles!

It began with collecting paper plates. 
Use any color. 
We used oval shaped paper plates 
but round works well too!

You will need 2 copies of laminated 
words and pictures 
of your Bible person's name 
and events that took place.
The words and pictures do not 
have to be very large. 
They are small enough to be easily 
held in your hand.

Tape the two matching words/pictures
together with clear tape not matt.  

Punch holes in the top each 
of the words/pictures. 
You could even punch the hole 
in the corner so the picture 
hangs on an angle. 


Black crochet thread weight #10 
is strong and looks really sharp 
when the mobile is finished!


4 holes were marked in the 
center of the plate with a pencil
and punched through
with a pencil as well.
2 pieces of long string 
are used for hanging the mobile. 
With the bottom of the plate
facing you, thread one string 
down through a hole 
and come up through the hole 
across from the first hole. 
Then do the same action 
with the left over string 
and holes across from each other. 
Tie all 4 ends together at the top.
 This will be for hanging. 
Leave it quite long until you 
hang it up in your room. 

For hanging the pictures, 
12 holes easily fit and 
were marked with a pencil 
around the rim of the plate. 
Then punched with a hole punch.


Cut long strings for however 
many holes you punched.
Then tie each picture onto the string. 
You should be able to tie more than 
one picture onto the same string.

With a fat black marker
print the name of your Bible person 
on the colored part of the plate, 
or type/print it out and tape it centered 
onto the colored side of the plate. 
so your students can see the name 
of the Bible person and all 
of the words/pictures 
representing them. 

I hope you have lots of fun with this mobile!

You will find instructions, names, and words/pictures 
for several Bible person mobiles at the gold star below! 

A "Gold Star" Just for You!
Click on it!


Thanks for stopping by and feel free to leave a commnet!


The Bible Takes Us Places!

Hello and Welcome!

I truly believe the Bible does take us places, if we will only allow it!
That is why I was excited to find this little visual aid!


I actually modified it from a newspaper clipping. 
Such fun! 

We should be excited about reading God's Word! 
It takes us to the Promised Land 
when the Israelites were battling Jericho! 
To Egypt when Pharaoh's daughter found Moses! 
Inside the big fish with Jonah! 
Crossing the Red Sea with the Israelites!
In prison with Paul and Silas!
Inside the home of Mary and Martha when Jesus visited!
And many other places!

A "Gold Star" Just for You!
Click on it!

Thanks for stopping by and feel free to leave a comment!


Tuesday, June 16, 2020

Let's Make a Well!

Hello and Welcome!

Well, Well, Well!


There are several lessons in the Bible 
which include the use of a well. 
  • Hagar
  • Isaac
  • Jacob
  • Moses helps Zipporah
  • The Exodus
  • Jesus and the Woman at the Well
  • etc.
The lesson that made me want to structure a well was,
Jesus and the Woman at the Well.


Begin by finding a nice size piece of sturdy cardboard or plywood.
Next you will need brown lunch bags.

  
Lots of scrap stuffing materials
Old paper, plastic grocery bags etc. 
Stuff the bags to be your "bricks/stones" for the well.


Hot glue the opening closed.


Make a circle with your stuffed bags and hot glue the bottom layer to the board. 
Next, hot glue each level of "bricks" until you get 4 levels high. 


Beginning last level.


This is what it should look like before it is painted.


I used spray paint to paint the "bricks or stones". 
Then added tulle inside the well 
and then added clear blue gift wrap for the water.


We added fake grass a clay pot and some flowers to the outside. 

Have fun! 
Click on the gold star to find directions for this well!


A "Gold Star" Just for You!


Thanks for stopping by and feel free to leave a comment!


Drift Wood!

Hello and Welcome!

Memory Verse Prop!

To go along with our 
"Shipwrecked - Rescued by Jesus" 
theme for Vacation Bible School, 
I needed a way to have a portable memory verse for each day  
so it could be the center of attention when discussed 
but then set aside and still be in plain view. 

I was asked to make something resembling drift wood.  

The only thing I could think of was cardboard. 

I had some nice pieces that had been stored just for such a thing
and was able to put them to good use. 

Water based paint, water, brushes, cardboard, pencil, 
scissors, glue and I was good to go!


I began with brown then covered the brown with white
 then brown again, and lastly adding some black, 
making sure the layers of color shown through. 


I printed the Bible verses onto white paper 
and cut close to the letters and numbers 
then glued them onto the boards.
Also found a life ring on line and added the words
 - Bible Verse and day 1 - 4. 
That way the instructor knew 
which verse was for which day. 


Thanks for stopping by and feel free to leave a comment!


Monday, June 15, 2020

The City of Palm Trees!

Hello and Welcome!

Deuteronomy 32:1-3

Now Moses went up from the plains of Moab to Mount Nebo, to the top of Pisgah, which is opposite Jericho. And the Lord showed him all the land, Gilead as far as Dan, and all Naphtali and the land of Ephraim and Manasseh, and all the land of Judah as far as the western sea, and the Negev and the plain in the valley of Jericho, the city of palm trees, as far as Zoar.

Trees!


How many of us have fashioned a tree or two for our class room trying to help our students realize that Bible time land was real and had real trees?
Maybe it was the sycamore tree that Zacchaeus climbed, Luke 19:1-10.
Maybe the barren fig tree that withered when Jesus said it would no longer bare any fruit, Matthew 21:18-22
Then there’s always those creation lessons that could use a few different kinds of trees inside our room, Genesis 1:11-12.  

Palm Trees!


I want to share how another lady and myself made
palm trees one year for our Vacation Bible School!

We used brown and green bulletin board paper, a pencil, black sharpie marker, and scissors. We stapled them into the wall and used duck tape on the wood.
We laid out and layered the brown paper so as we drew and cut rectangles, there would be more than one tree being cut out at one time. The pieces get smaller as you go up so that it gives the illusion of being very tall . The pieces stacked nicely so they were easy to store until it was time to put them on the walls. 

As you can see, we were going to need several palm trees. 

After cutting out each piece for the trunk,
we crumpled them up then smoothed them out with our hands 
to look more like tree bark.


When it came to cutting the leaves, 
we looked up patterns on line 
and drew them out as best we could. 
Each tree had 4-6 long leaves.
Layer the green paper, 
drawn one leaf on top piece of paper, 
and cut 5-6 all at once! 


Helpers added balls 
of the brown paper for coconuts
and crumpled tan paper for the sand.
As you build the trunk of the tree,
 you can tilt the rectangles 
to make your tree lean different directions.

Here are more pictures of our "Shipwrecked - Rescued by Jesus" Theme!


I think you will need a tall ladder! 


Thanks for stopping by and feel free to leave a comment!